Step 3. Map the Region
Your region worksheet included with the Chalksworn Playkit has space at the top to draw a map of the area you will make. Keep the map simple and light on details, there are a great many things to discover in the Lowlands so you’ll want to make sure to have available space.
It’s important to note that a map is not required to play, it just makes tracking the fiction and planning on where to go easier.
Choose where you want your settlements to be, they can be anywhere on the map. The hexes are not exact distances, rather they are meant to simply be an aid in visualizing how near and far away different settlements are to one another. Dots, letters, numbers, or any simple shape will work fine to mark the location of a settlement.
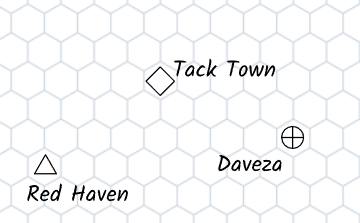
For the above example, the names of the locations are written next to their icons, but it is recommended that you should write the names of the locations in the Locations section beneath the map on your region worksheet instead of on the map itself - that way you can map new locations of interest more easily. You may want to then add some unique feature to each location’s icon and associate it with the location name below, that way your map is more legible at a glance.
Chart the Routes
Next, you’ll set the known routes for this region. A route is any known, relatively safe path between two locations. These are frequently found out by couriers and spread via word of mouth to help ensure safe travels. They can be literal pathways and roads, but they can just as easily be verbal instructions such as, “Go northeast for three leagues, then turn directly east and continue forward till you reach Tack Town.” Flavor them however you would like, but you don’t need to write down any details.
From a mechanics perspective, a course should encourage you to reduce the challenge rank whenever you Undertake a Journey between two locations that are connected by a route. This will make it less likely for your character to get lost, burn resources, or face terrible hardships - and in turn it will draw less focus to the journey itself.
Whenever you are traveling uncharted paths through the Lowland Wastes, you will instead likely be raising the challenge rank of your journey, factoring in how much information you have on how to get to where you want to go as well as any notable terrain that could help or hinder your journey. The journey will likely be harder and more attention will be drawn to it during play, but you will be rewarded when you finish with experience for reaching a new location. Additionally, you will likely be able to create a new route between where you came from and where you just arrived at.
Set the Number of Routes
In the normal course of your campaign, learning about routes and getting navigational information might be challenges to overcome. For the starting region, determine the number of known routes by finding your biome in the following list:
- Breadbasket: 2 Routes
- Weeds: 1 Route
- Thickwood: 0 Routes
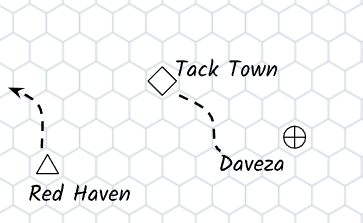
Mark Routes
Draw the routes as lines on your region map. Each route must do one of the following:
- Connect two settlements
- Connect a settlement to the edge of your region map, leading to another region.
In this example of a region in the Breadbasket, we’ve created one route between Tack Town and Daveza, and a second route from Red Haven to a not yet known other region. This means that traveling between Tack Town and Daveza will be easy, but going from either of them to Red Haven will require some trailblazing. Red Haven, however, has an easy pathway to somewhere else not on the map, allowing you to establish the destination of that easier journey at another point.